You bought a great Mac. But are you really getting the most out of it? Let’s be honest. Most of us stick to a few apps, check email, and browse the web. You paid for the whole machine, but chances are you’re only using half of it.
A lot of the best features are either turned off or hidden deep in menus. This post will show you the secret settings that unlock the other half of your Mac.
We’re not talking about little tweaks here. These are the changes that actually make a difference. They’ll help you work faster, think smarter, and get more done.
Let’s dig into the hidden features that can supercharge your workflow.
Contents
- 1 1. Tame Your Desktop with Stacks
- 2 2. Make Hot Corners Actually Useful
- 3 3. Spotlight: Your “Interruption-Killer”
- 4 4. Automate Your Life with Text Replacement
- 5 5. Unlock “Pro Mode” for Your Finder
- 6 6. Find One of Apple’s Best Hidden Mac Features
- 7 7. The Screenshot Secret You Are Definitely Missing
- 8 8. Accessibility “Power-Ups”: Top macOS Productivity Tips
- 9 9. The Best Secret Settings for Your Mac? Proofreading.
- 10 Your Mac is Now Supercharged
1. Tame Your Desktop with Stacks
Take a look at your desktop. Is it a total mess? Don’t worry, we’ve all been there.
You drop files on the desktop for quick access. Then before you know it, screenshots, PDFs, and random images are everywhere. It’s stressful, and good luck finding anything.
The fix? Two seconds. Right-click anywhere on your desktop and hit “Use Stacks.” Boom. Your Mac groups everything automatically. Screenshots together, documents together. It’s like magic.
But Stacks isn’t just about making your desktop look nice. It’s a little behavioral hack. You can keep tossing files onto the desktop because Stacks will handle the chaos. No more stressing over where things go.
It’s one of those small macOS tricks that actually clears your head and makes you more productive.
2. Make Hot Corners Actually Useful
Hot Corners. You’ve probably tried them once and then swore them off forever.
The idea sounds great. Move your mouse to a corner, and something happens. Mission Control pops up, or your screen locks. But here’s the problem: you trigger it by accident all the time. Super annoying.
There’s a little trick that changes everything. One tiny tweak makes Hot Corners actually useful.
How to Set It Up
- Go to System Settings, then Desktop & Dock.
- Scroll to the bottom and click “Hot Corners.”
- Pick a corner and choose an action, like Mission Control.
- Here’s the secret: hold the Command key (or Option/Shift) while you click the option. You’ll see it change to “⌘ Mission Control.”
That’s it. Now the corner only works when you hold Command. No more accidental pop-ups, just a deliberate, powerful shortcut. One of those hidden Mac tricks that actually makes your workflow smoother.
3. Spotlight: Your “Interruption-Killer”
Stop. Opening. Your. Calculator.
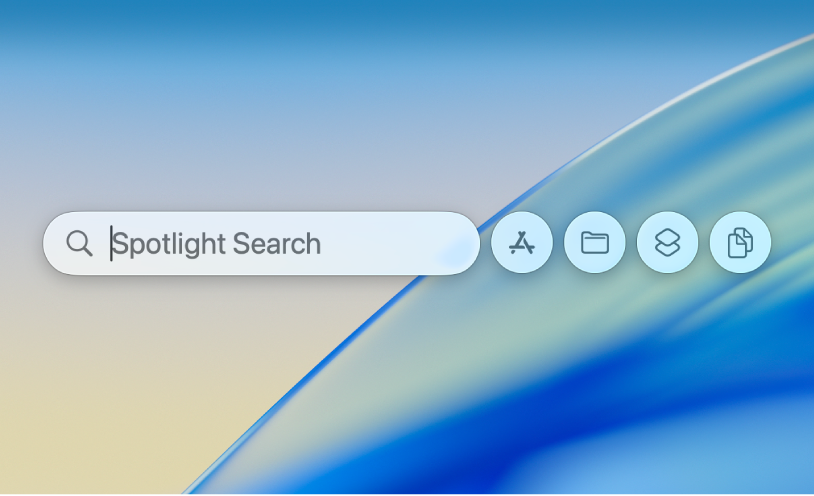
Stop opening your browser for conversions. Your Mac is a calculator. And a dictionary. And a currency converter. Its name is Spotlight.
You launch it with Cmd + Space. Most people use this to find files. That is just 10% of its power.
Spotlight is an action tool. Its real job is to kill interruptions. It stops you from context-switching. You can stay in your workflow.
Try these commands right in the Spotlight bar:
- 100*3.5 + 50 (It does math instantly)
- $150 in EUR (It converts currency)
- def: serendipity (It gives you a definition)
- Restart (You can run system commands)
- kind:image vacation (It finds specific file types)
Start thinking of Spotlight as your command center, not just a search bar. Once you do, it becomes one of those little macOS tricks that makes a huge difference in how smoothly you work.
4. Automate Your Life with Text Replacement
This is one of my favorite hidden Mac features. It is buried in your keyboard settings. It seems simple. But its potential is massive.
The feature is Text Replacement. It lets you type a short snippet. Your Mac replaces it with a longer phrase.
Most people use it for “omw” (on my way). That’s fine. But we can do more. We can automate our entire digital life.
How to Set It Up
- Go to System Settings > Keyboard.
- Click “Text Replacement” (you may need to find it under “Text Input”).
- Click the + icon to add a new one.
- In “Replace,” type your shortcut. In “With,” type your phrase.
Your New Automation Starter Pack
- @@: Replaces with your full email address.
- ##: Replaces with your phone number.
- ;adr: Replaces with your full mailing address.
- ;eml: Replaces with a full canned email. “Hi team, I’ve received this and will look into it. Best,”.
Think about what you type every day. Automate it. This setting works everywhere. In your email. In your browser. In your notes.
5. Unlock “Pro Mode” for Your Finder
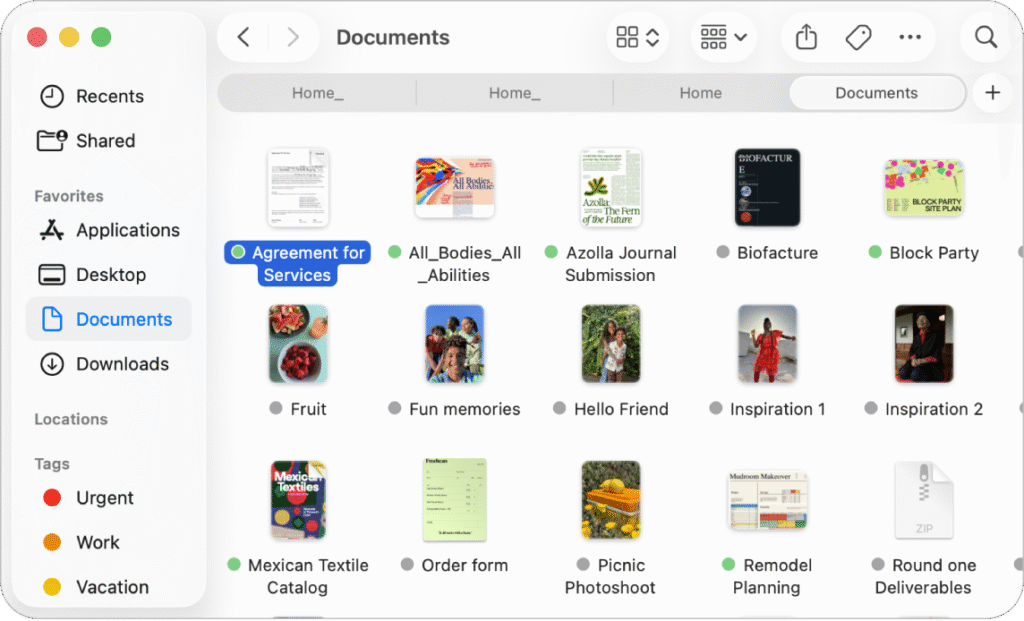
By default, Finder is too simple. It hides information. You get lost in folders. You do not know where you are.
Let’s fix this. We will enable two settings. They will upgrade your Finder to “Pro Mode.”
Open a Finder window. Click “View” in the top menu bar.
- Select “Show Path Bar.”
- Select “Show Status Bar.”
Two small bars will appear. Their impact is huge.
The Path Bar (at the bottom) shows your folder path. You can see exactly where you are. Better yet, it’s clickable. You can jump back three folders instantly. You can even drag folders from the path bar.
The Status Bar (below the Path Bar) tells you two things. How many items are in your folder. And how much space is free on your hard drive.
These are not flashy. But these secret settings for your Mac are essential. They provide mission-critical information at a glance.
Also Read: You’re Using Apple Notes All Wrong: 20 Hidden Apple Notes Tricks That Make Life So Much Easier
6. Find One of Apple’s Best Hidden Mac Features
This is one of the most classic hidden Mac features. Your Mac has a “Library” folder. It is hidden for a good reason.
This folder stores your app settings. It holds caches. It contains plugins and fonts. Apple hides it so users don’t accidentally break their system.
But you are a power user. You need to access this. You might want to clear an app’s cache. Or manually install a plugin. Or clean out old files from an app you deleted.
How to Unhide Your Library
- Open Finder.
- Click “Go” in the top menu bar.
- Go to your “Home” folder (or press Cmd + Shift + H).
- Now, click “View” in the menu bar.
- Select “Show View Options.”
- A small panel will pop up. Check the box that says “Show Library Folder.”
It will now appear in your Home folder. Permanently.
A quick warning: Be careful in here. Do not delete things randomly. But now you have the keys to the castle. You can troubleshoot problems like a pro.
7. The Screenshot Secret You Are Definitely Missing
I have a question. How do you take a screenshot?
You probably use Cmd + Shift + 4. That’s good. Or maybe Cmd + Shift + 3 for the whole screen.
You are using the old way. There is a much better tool.
Press Cmd + Shift + 5.
A new menu appears. This is the unified screenshot utility. It lets you capture a window. Or a selection. Or record your screen.

But that is not the real secret.
The secret is what happens after you take the shot. A small thumbnail floats in the corner.
DO NOT ignore this thumbnail. Click it.
You instantly enter Markup mode. You can draw arrows. You can add text. You can sign your name to a document. You can crop the image.
You do all this before the file is even saved.
When you are done, just drag the thumbnail. Drag it from the corner directly into an email. Or a text message. Or a Slack chat. It never even has to hit your desktop.
It is no longer just “capture.” It is a full workflow: Capture > Annotate > Share.
8. Accessibility “Power-Ups”: Top macOS Productivity Tips
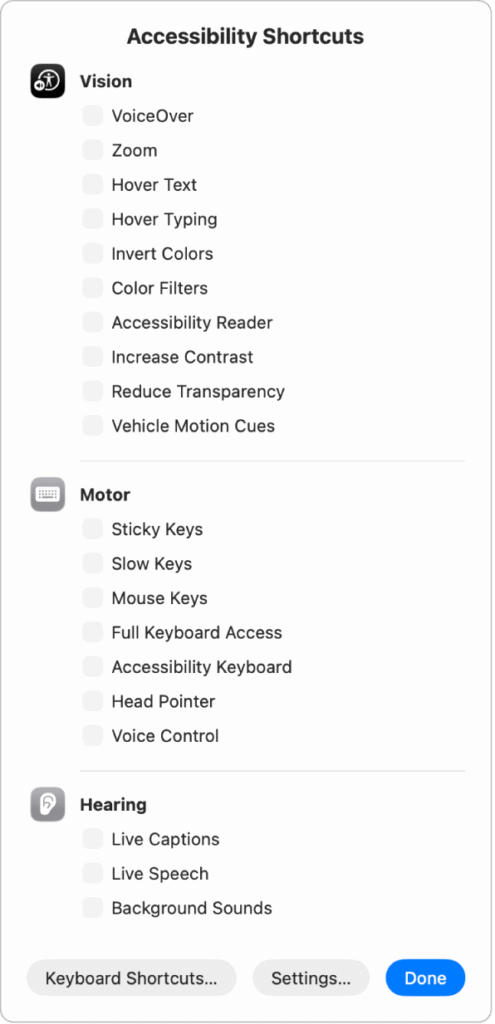
The Accessibility menu is full of hidden Mac features. Most people ignore this menu. They think “these are not for me.”
They are wrong. These are secret power-ups. These are some of the best macOS productivity tips.
Let’s start with Zoom. This is not the “Zoom” in your browser. This is a system-wide magnifier. It is a secret weapon for designers. And for writers.
How to Set It Up
- Go to System Settings > Accessibility > Zoom.
- Turn on “Use keyboard shortcuts to zoom.”
- Turn on “Use scroll gesture with modifier keys.”
Now, hold the Control key and scroll up with your mouse.
You can zoom in 800%. You can see the individual pixels.
For a designer, this is essential. You can check if two elements are perfectly aligned. A writer can inspect fonts and kerning. A developer can check a border. It is a pixel-perfect inspection tool. This is one of the cleverest secret settings for your Mac.
Related: I Changed These 13 Settings on My Apple TV and Now It Runs Super Fast Like a Brand New Device
9. The Best Secret Settings for Your Mac? Proofreading.
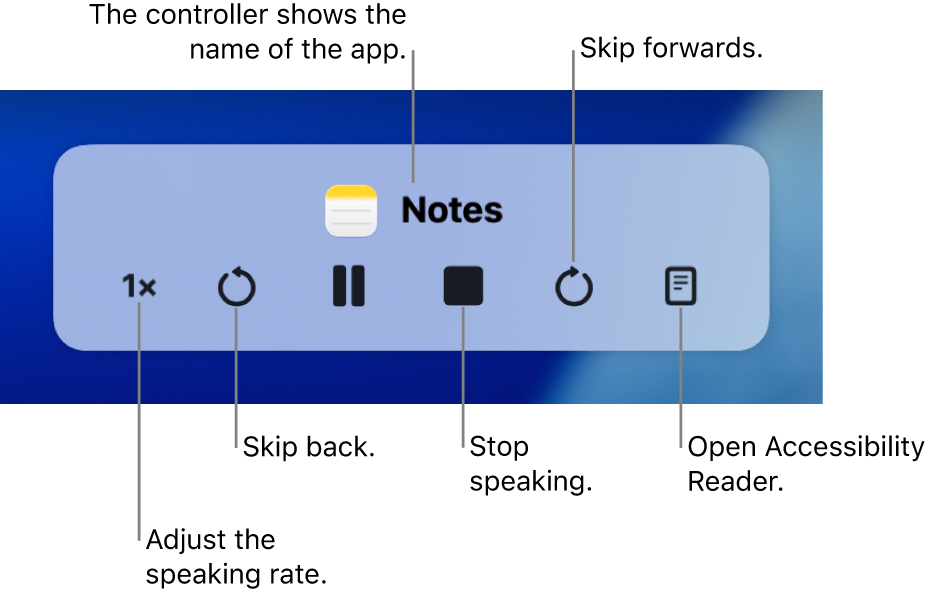
Here is our final “off-label” secret. It also lives in Accessibility. It is called “Spoken Content.”
This feature will find typos you cannot see.
Here’s why. Your brain is a terrible proofreader. It knows what you meant to write. It auto-corrects mistakes as you read. You skip right over missing words.
But a cold, robotic voice will not skip them.
How to Set It Up
- Go to System Settings > Accessibility > Spoken Content.
- Turn on “Speak selection.”
- Click the “i” button to set a keyboard shortcut.
- I use Option + Esc. It’s easy to remember.
Now, go to any text. An email you are about to send. A report you just finished. Highlight the text. Press your shortcut.
Your Mac will read it aloud.
You will immediately hear the errors. A missing “the.” An awkward sentence. A repeated word. It catches everything your eyes miss. This is one of the smartest macOS productivity tips built right into the OS.
Your Mac is Now Supercharged
Your Mac is full of power. You just have to know where to look.
By now, you’ve unlocked features you’ll actually use every day. You’ve cleaned up your desktop, automated your typing, and even turned your Mac into a pro-level proofreader.
These are the real secret settings for your Mac. They change how you work.
These are the real hidden settings that change the way you work. Don’t just stick with the defaults. Dig into the settings. You paid for the whole machine, so it’s time to actually use it.
What are your favorite secret Mac settings? Share them; we’d love to hear!