It happened during the witching hour for new parents. I was sleep-deprived and utterly distracted when my phone rang.
The caller claimed to be from PayPal. They said my account was compromised. They sounded professional and urgent. They were sending security codes to my phone and email, and I just needed to read the codes back to them to secure my account.
In that moment of chaos, I did exactly what they asked. Later that day, a string of fraudulent transactions confirmed my mistake. I had been hacked.
Of course, the attack wasn’t a breach of Apple’s servers. It was a simple but effective trick called vishing, or voice phishing. The scammers created a false sense of urgency, impersonating a trusted company to bypass my rational thinking.
While I eventually got my money back, the feeling of being violated and foolish lingered. My iPhone, a device I trusted with my family’s photos, my financial data, and my health information, suddenly felt vulnerable.
That experience forced me to become a student of my own device. I discovered that while my iPhone was secure, I wasn’t using its full potential. I found several powerful, yet little-known, security tools built right into iOS.
Here are five hidden Apple security features I wish I had known about before that fateful call.
To help you understand the threats and the tools we’ll discuss, here’s a quick guide to some of the best defenses your iPhone has to offer.
Threat Vector
Primary Apple Defense Feature
How It Protects You
Required iOS Version
Social Engineering (Vishing / Scam Calls)
Live Voicemail
Screens unknown calls by providing a real-time transcript of the voicemail, letting you vet the caller without answering.
iOS 17 or later
Physical Theft (with Passcode Known)
Stolen Device Protection
Enforces a one-hour delay and requires Face/Touch ID for critical actions when away from familiar locations.
iOS 17.3 or later
Unauthorized App Access (Snooping)
Lock & Hide Apps
Requires Face/Touch ID to open specific apps and can hide them from the Home Screen and system search.
iOS 18 or later
Online Data Harvesting (Web Tracking)
Safari Intelligent Tracking Prevention
Uses on-device machine learning to block cross-site trackers and provides a Privacy Report to show you its work.
Enabled by default
Account Takeover (Weak/Reused Passwords)
Passwords App
Centralizes password management, generates strong, unique passwords, and integrates 2FA verification codes.
iOS 18 or later
Contents
1. Deflecting Scammers with Live Voicemail
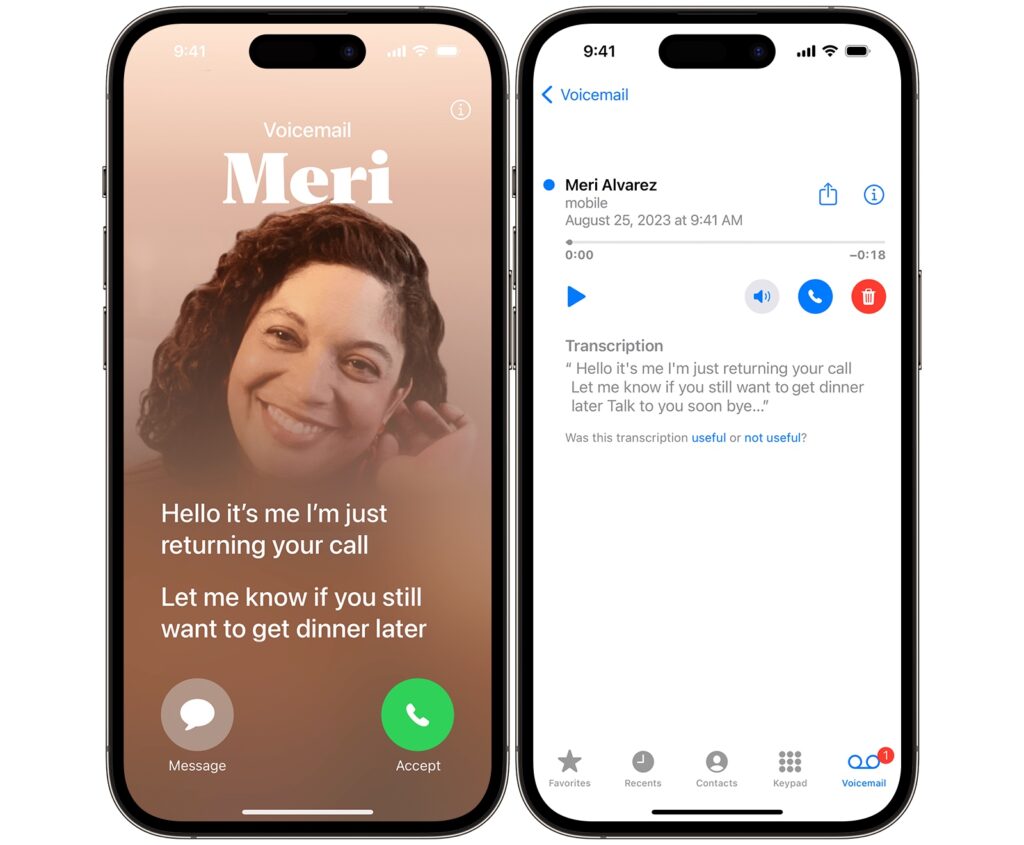
If I had this feature active, that scam call might never have reached me. Introduced in iOS 17, Live Voicemail is a brilliant first line of defense against vishing attacks. It acts as a personal receptionist, screening calls from unknown numbers for you.
When an unknown number calls, your iPhone can answer it automatically. It then displays a real-time, on-screen transcription of the message the caller is leaving. You get to see exactly who is calling and why, all without ever picking up the phone.
The transcription happens securely on your device, so your privacy is protected. Based on what you see, you can decide to ignore the call or jump in and answer it while they’re still on the line.
This simple feature is devastatingly effective against scammers. Their business model relies on speed and volume; they need to make hundreds of calls to find a few vulnerable targets.
When faced with a screening service, most automated robocalls and many human scammers will simply hang up. It’s not worth their time to leave a detailed, incriminating message that is being transcribed.
Live Voicemail introduces a mandatory delay and verification step that breaks their workflow, causing them to filter themselves out.
How to Enable Live Voicemail
- Open the Settings app.
- Scroll down and tap on Phone.
- Tap on Live Voicemail.
- Make sure the toggle is turned On.
This feature is on by default in iOS 17 and later, but it’s crucial to check that it’s active.
For an even stronger defense, you can pair this with Silence Unknown Callers. Found in the same Phone settings menu, this feature sends any call from a number not in your contacts straight to Live Voicemail without your phone ever ringing.
Also Read: I Always Install These 6 Free Apps on Every Windows PC – They Make Life So Much Easier
2. Using Stolen Device Protection
While the scam call violated my privacy, the thought of someone stealing my phone, and my passcode, is even more terrifying.
A thief with your passcode could historically change your Apple ID password, locking you out of your digital life. That’s where Stolen Device Protection comes in.
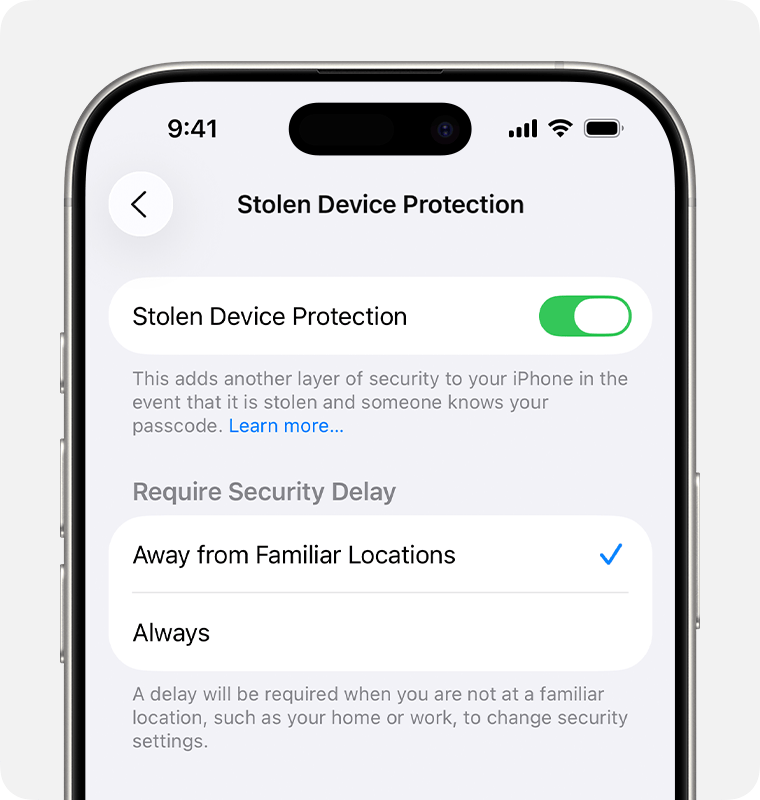
Available since iOS 17.3, this is one of the most important hidden security features you can enable. It adds a powerful layer of iPhone security that activates when your device is away from “familiar locations” like your home or workplace. It protects you even if a thief has both your phone and your passcode. The feature works in two key ways:
Mandatory Biometrics: When you’re in an unfamiliar location, your iPhone will demand Face ID or Touch ID for sensitive actions like accessing your saved passwords or using credit cards saved in Safari. The option to use your passcode as a backup is completely removed, blocking a thief in their tracks.
The Security Delay: For the most critical security settings, like changing your Apple ID password or turning off Find My, the feature enforces a one-hour security delay. A thief would have to authenticate with your Face ID, wait an hour, and then authenticate again to make the change. This one-hour window is designed to give you enough time to use another device to mark your iPhone as lost, rendering it useless to the thief.
This feature fundamentally makes your iPhone a less attractive target for thieves. It transforms the device from a high-value data treasure trove into a time-locked, biometrically-sealed brick.
How to Enable Stolen Device Protection
- First, ensure you have Two-Factor Authentication, Face ID or Touch ID, and Find My enabled. You also need to turn on Significant Locations under Settings > Privacy & Security > Location Services > System Services.
- Go to Settings, then tap Face ID & Passcode.
- Enter your device passcode.
- Scroll down and tap Stolen Device Protection, then turn it on. You can choose to have it active only when “Away from Familiar Locations” or “Always” for maximum protection.
Also see: I use Perplexity daily: Here are my Favorite 7 prompts that actually help
3. How to Lock and Hide Individual Apps
Your next layer of iPhone security protects you from someone who has access to your unlocked phone. This could be a snooping friend, a curious child, or a thief in the moments before your device locks. With iOS 18, Apple finally gave us the ability to lock and hide individual apps.
This powerful feature is actually two distinct functions:
Locking an App: This requires your Face ID, Touch ID, or passcode to open a specific app. When an app is locked, its content is also hidden from system-wide places like search results, notifications, and Siri suggestions.
Hiding an App: This includes all the protections of locking an app, but also removes the app’s icon from your Home Screen. The app is moved to a special “Hidden” folder in your App Library, which itself requires authentication to open.
After my hack, I immediately used this to lock my son’s daycare app, which contains his photo, location, and daily schedule. It’s perfect for banking apps, messaging apps like WhatsApp, your Photos app, or any other application containing sensitive data.
How to Lock and Hide an App
- On your Home Screen, press and hold the icon of the app you want to secure.
- From the menu that appears, tap Require Face ID (or Touch ID).
- Confirm your choice. For most third-party apps, you will see a second option to Hide and Require Face ID.
- Authenticate with your face or fingerprint to finalize the setting.
To find your hidden apps, simply swipe to the end of your Home Screen pages to open the App Library. The “Hidden” folder will be at the bottom.
4. Erasing Your Digital Footprints

Securing my device was my first priority, but the hack also made me think about my online privacy. Every day, advertisers and data brokers use cross-site tracking to follow you across the web, building a detailed profile of your habits and interests.
Safari has a powerful, built-in defense against this called Intelligent Tracking Prevention. This feature is on by default and uses on-device machine learning to identify and block known trackers from following you. You don’t have to do anything to turn it on. But the best part is that you can see it working.
Safari’s Privacy Report makes the invisible visible. It gives you a snapshot of all the trackers Safari has blocked on the website you’re currently visiting, as well as a 30-day summary of all the trackers it has prevented from profiling you.
It’s an empowering tool that shows you proof of your protection. This is a core part of Apple security that sets it apart from competitors whose business models rely on data collection.
How to View Your Privacy Report
- Open Safari on your iPhone.
- Navigate to any website.
- Tap the AA icon in the address bar on the left.
- From the menu, select Privacy Report.
This report, combined with other Safari features like IP Address Hiding and Fingerprinting Defense, creates a robust shield that helps keep your browsing behavior private.
5. Centralizing Defenses with the Passwords App
After the hack, I faced the painful task of changing dozens of passwords. I realized my biggest mistake was reusing the same weak password across multiple sites.
For years, Apple has offered password management through iCloud Keychain, but it was a background feature hidden in Settings.
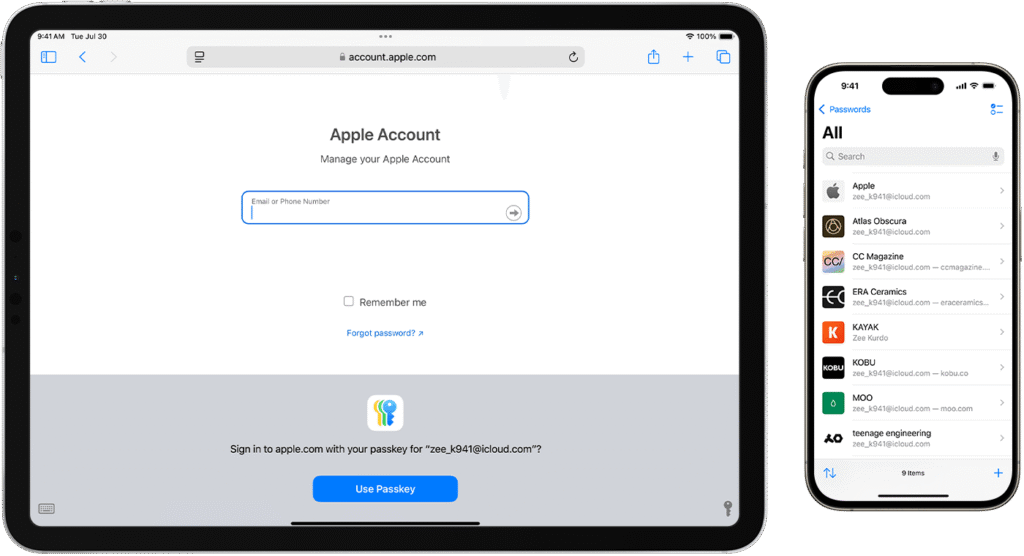
With iOS 18, Apple launched a standalone Passwords app, a massive upgrade that makes proper password hygiene easy and accessible. This app provides a clean interface for all the credentials securely stored in your iCloud Keychain. Key improvements include:
- A Central Hub: All your passwords, passkeys, Wi-Fi passwords, and verification codes are in one easy-to-search app.
- Integrated 2FA Codes: The app can now generate two-factor authentication (2FA) codes, so you no longer need a separate app like Google Authenticator.
- Proactive Security Alerts: A dedicated “Security” section flags any weak, reused, or compromised passwords from data breaches and prompts you to change them.
The core principle is simple: let the Passwords app generate and save strong, random passwords for you. You only need to remember your iPhone’s passcode, and the app handles the rest.
This is one of the most impactful hidden Apple security features for preventing account takeovers.
Also Check: Don’t Let Strangers Find You: 9 Tips to Protect Your Home Address From the Internet
From Victim to Guardian of Your Digital Life
That frightening phone call was a wake-up call. It taught me that the strongest lock is useless if you hand over the key. These five hidden Apple security features empower you to be the guardian of your own digital life.
Don’t wait for a crisis to take action. Take 15 minutes right now to explore your iPhone’s settings and enable these features. And if you’re ready to take your Apple security to the next level, here are two more bonus features to set up:
- Safety Check: Found under Settings > Privacy & Security, this tool lets you quickly review and revoke who and what has access to your data and location. It’s an excellent tool for a regular privacy audit.
- Account Recovery Contact: This allows you to designate a trusted friend or family member who can provide you with a code to get back into your Apple ID if you’re ever locked out. It’s a crucial safety net to prevent losing access to your entire digital world.
Your iPhone is an incredibly secure device, but its strongest features are the ones you know about and actively use. Take control today.