Ever reach for that jar of oregano, rosemary, or basil only to find it’s past its prime, a mere shadow of its former fragrant self?
Or maybe you come across a killer deal on fresh herbs at the farmer’s market but know they’ll wilt faster in your crisper than you can use them all. Been there, done that!
Fresh herbs are amazing, but they can be a pain to keep around for too long. But what if we told you there are some super-simple ways to turn that fresh herb stockpile into a flavourful goldmine that lasts for months?
Drying and preserving herbs is a magical process we humans have mastered and perfected over thousands of years – and luckily, you don’t have to be a pro! In fact, it’s easier than you think, and we’re here to be your guide.
Contents
First Things First: What Herbs Can You Dry?
Alright, so you’re all fired up to dry those herbs – awesome! But before we jump in, let’s talk about which ones dry best and which ones might need a little more TLC.
Here’s the thing: every herb is a bit different. Some, like basil, sage, rosemary – those big, fleshy leaves don’t need much fussing before drying. Others, like dill, tarragon, and thyme, have smaller leaves that might take a little more care to pick off the stems.
The good news is, you can dry pretty much any herb you want! Just remember to label them afterwards, because trust us, a pile of dried green leaves can get confusing fast.
Now, one thing to keep in mind: drying changes the flavour ever so slightly. They tend to pack a wallop, more punch per pinch compared to fresh. They taste a little different, not as “green” maybe, but still amazing!
Wouldn’t you rather have a pinch of dried oregano in your pizza sauce than go without? Exactly what we thought! And besides, dried herbs have a whole different kind of magic you can sprinkle into all sorts of dishes.
| FAQ: Are there any herbs you shouldn’t dry?
Most will do great, but a few are better off fresh because their flavour magic comes from delicate oils that don’t love the drying process. Chives, parsley, and tarragon fall into this category. |

Methods of Drying Herbs
Here comes the fun part: drying your herbs! There are a few options on the table, depending on what tools you have on hand and how much of a hurry you’re in. Here are four easy ways to turn those fresh herbs into ever-lasting flavour bombs.
Air-Drying
This is the OG, traditional method, the way our grandparents (and their grandparents) dried herbs. It’s super simple too!
First, grab a bunch of your herbs, about an inch thick. Next, tie them together with a rubber band. The stems shrink as they dry, so the band keeps everything snug.
After that, simply hang them upside down in a cool, dark, well-ventilated place. Your attic, basement, or even a closet could work well. Just make sure they’re not in a drafty spot or covered in dust!
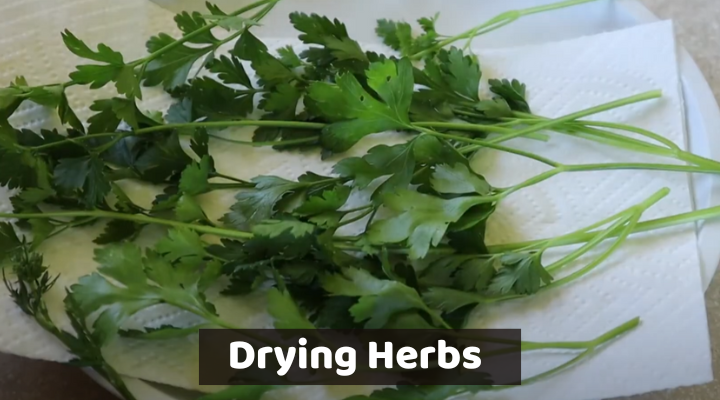
The other way to air-dry is to pluck the leaves off the stems and spread them out on a clean mesh rack or tray. Find a spot that’s out of direct sunlight and away from breezes. On top of the fridge works, but again, a dark, airy room is ideal.
No matter which method you choose, it should take about a week for your herbs to dry completely, give or take. The more moisture in the air, the longer it takes.
Check the moisture level every now and then by grabbing a leaf and crumbling it between your fingers. If it breaks easily, it’s good to go!
Microwave-Drying
Who knew your microwave oven could do the same job but faster? Yep, it’s true! Just separate the leaves from the stems, wash them, and pat them dry with a dishcloth. Then, sandwich them between two paper towels and microwave them for a minute.
Check on them throughout, and if they’re not quite dry yet, keep going in 30-second bursts until they’re crisp and start to crumble easily.
Dehydrating
For those who like a more hands-off approach, a food dehydrator is a fantastic option, especially if you’re drying a lot of herbs at once.
Ensure your herbs are clean and spread them out in a single layer on each tray. Mesh inserts are a lifesaver to keep those tinier, more delicate leaves from falling through.
Set the dehydrator to the lowest heat setting (preferably between 95°-115°F) and let it do its thing for a few hours. Dehydrators usually give you a suggested drying time, but it’s a good idea to check in halfway through.
Bigger, leafier herbs like sage, rosemary, chives, and mint can take roughly between 9 to 15 hours. The smaller, finer ones like dill, cilantro, thyme, and fennel might be done in just 3 to 6 hours.
The trickiest part might be taking the dried herb out. Do it over a bowl or cloth to catch the precious crumbles – every bit counts!
Magic Mill Food Dehydrator Machine

Oven-Drying
If you don’t have a fancy dehydrator, your trusty oven can also get the job done. Here’s how.
Grab a silicone baking mat or a cheesecloth to prevent the leaves from sticking to the pan. Set your oven to the lowest setting (less than 180°F) and leave the herbs for about half an hour. Just like the other methods, they’re ready when they crumble easily.
Heads up: oven-drying can cook your herbs a bit, meaning they lose some of their punchy flavour. They’ll still be delicious, but you might just need to use a tad more than you would with fresh herbs.
| FAQ: How do I decide which method to go for?
Herbs like bay, dill, rosemary, marjoram, sage, thyme, and oregano already have less moisture, so air-drying lets them dry out nice and slow. But other herbs, like basil, chives, lemon balm, tarragon, and mints are juicier and need a little more help drying out quickly. That’s where dehydrators or your oven come in – they’ll zap out that extra moisture so your herbs don’t get mouldy. No matter which drying method you choose, you’re well on your way to having a stash of delicious, homegrown herbs to flavour your dishes for months to come! |
Storing/Preserving the Herbs
Now that you’ve dried your herbs – high fives all around! Time to show you how to keep those fresh and flavourful for as long as possible:
Inspect for Mould
First things first: any sign of mould, ditch it! Mould is no bueno and can spread like wildfire through your herbs. So, a quick inspection before storage is vital.
Use Airtight Containers
You know how air, moisture, and direct sunlight can ruin a perfectly good bag of chips? The same goes for dried herbs. They must be stored in airtight containers. Small mason jars are perfect for this, or even those cheap zipper bags you have lying around.
Here’s a neat tip: storing the leaves whole helps them hold their flavour longer. Just crumble them up when you’re ready to use them in a recipe to release all those yummy essential oils hiding inside.
Stash Jar Smell Proof Container (4 oz) Matte Black Viewing Jars for Herbs, Spices, Coffee, Teas & More, Air Tight Jar

Jar ‘Em Up
With your herbs nice and dry, gently pick the leaves (and flowers, if any) off the stems and toss them in your jar or container. Fill it all the way to the brim, then screw on the lid tightly to create an airtight seal.
Label it
Put a label sheet on the jar (if there isn’t one already) and write the date and the type of herb you’re storing. Hence, you’ll know exactly how long those herbs have been hanging out, and you can always prioritise using the older ones first.
Store Out of Sunlight
Speaking of hanging out, if using clear jars or plastic containers, keep them out of direct sunlight. Think of it like protecting your skin, it won’t last long in the sun all day, and neither will your herbs.
But hey, if you find some cool amber-coloured jars, those are even better – they block sunlight naturally!
Amber Glass Jars for Spice, Liquid, Sample, Leakproof and Dishwasher Safe

| FAQ: How long will dried herbs last?
Technically, dried herbs can last forever with proper storage. But like anything else, the longer they sit around, the less potent their flavour and nutrients become. Generally, expect them to be at their peak for about six months to a year. |
Pin This Guide For Later
Tips to Use Dried Herbs in Cooking
Cooking with dried herbs is similar to using fresh ones, except for one key difference: quantity. Since dried herbs have a more concentrated flavour, you’ll only need about one teaspoon of crumbled dried leaves to replace one tablespoon of fresh herbs.
Fresh herbs are still the king when it comes to certain dishes, like tossing them in a salad or adding that finishing touch of basil on a Caprese. However, dried herbs are great substitutes for most cooked meals – bakes, stews, or good old-fashioned fry-ups – you name it!
The beauty of dried herbs is their versatility. Add them to your sauce, toss them in your soup, or sprinkle on roasted fish, the possibilities are limitless. Use them all year round and even whip up your own spice mixes.
And don’t forget about tea! Drying herbs is a fantastic way to create your own custom tea blends. If you’re a tea lover, consider planting a little herb garden – using fresh, homegrown herbs makes the most delicious cups!
Herb Your Enthusiasm
That’s it! You’re now officially equipped to dry and preserve your herbs like a pro. From simple air-drying to fancy dehydrators, you have a whole toolbox of techniques to keep those flavourful greens at the ready.
Drying your herbs is a fantastic way to enjoy the freshest, most potent flavours all year long. No more scrambling to use everything up before it wilts, or wondering if those store-bought herbs have been sitting on the shelf for ages. Plus, if you’re growing your own, drying them at home can save you some serious cash.
We might be a little biased here, but we love the rustic charm of hanging herbs all over the place. But of course, there’s no single right way to dry herbs! So, experiment, find what works best for you and your herb haul, and let us know in the comments below!