Making your own quilts is one of life’s greatest pleasures, and we’re here to help you fall in love with creating cozy, beautiful quilt projects.
Quilting is all about stitching layers of fabric together to make everything from heirloom quilts to quilted clothes and home decor such as table toppers and wall hangings.
It’s a craft that’s been cherished and handed down through generations, and right now, it’s more popular than ever. There’s never been a better time to get into this hobby!
Don’t worry if you’re new to sewing. In fact, you don’t need to be an expert or even own a sewing machine to begin. You can make an entire quilt by hand, which is not only rewarding but also incredibly fun and relaxing.
This guide is your one-stop shop for learning how to quilt.
We’ll walk you through the basics, from picking out pretty fabrics to stitching those pieces, whether you choose to do so by hand or machine, to create something extraordinary for yourself or gift with pride.
Contents
- 1 Quilting: What You Need to Know
- 2 Quilting Essentials: Your Must-Have Starter Kit
- 3 How to Make a Quilt: Step-by-Step Guide
- 4 How to Quilt by Hand: Stitch Anywhere, Anytime!
- 5 How to Quilt by Machine: Stitch Like a Pro!
- 6 How to Bind Your Quilt: The Grand Finale
- 7 Learn How to Quilt As You Go (QAYG)
- 8 Quilting Patterns for Beginners
- 9 How to Quilt on a Budget
- 10 At a Glance: Basic Quilting Terminology
- 11 Tips for Quilting Success
- 12 You’re Officially a Quilter!
Quilting: What You Need to Know
Before we dive deeper, let’s break down the basics of quilting. As mentioned earlier, it’s all about stitching together three layers of fabric to create a cosy masterpiece. Think of it like a giant fabric sandwich, containing:
- The Top Layer (Quilt Top): This is the pretty part you see on the outside, often made from colourful patterned fabrics.
- The Back Layer (Backing): It’s like the other side of the bread – it holds everything together and can be a solid colour or a fun pattern too.
- The Middle Layer (Batting): This fluffy layer is responsible for keeping you warm and adds a nice, squishy feel to your quilt.
You can sew these layers together by hand using simple knots or stitches, or you can use a sewing machine for faster stitching.
The pattern of stitches can be basic lines for beginners or something more fancy (as we’ve discussed in detail in our guide to sewing baby quilts with a walking foot if you’re feeling creative.
Most quilters use regular sewing machines, but there are also special extra-large models for handling really big quilts.
No matter how you sew it, the stitches in quilting are usually small and close together – keeping everything nice and secure and preventing the layer from shifting or getting bumpy over time.
Fun fact: Quilting is actually super old! The word “quilt” itself goes back all the way to the 13th century in England. Back then, people mostly made quilts to keep warm at night or use them for under-armour cushioning, and they even became treasured family heirlooms passed down through generations.
Quilting was also used to make fancy clothes for rich folks in 17th-century English society!
There are amazing historical quilts preserved in museums around the globe, showing off the incredible display of creativity and talent of quilters throughout history.
It wasn’t until the late 1600s that quilting really took off in the United States.
It became a way for the working class to come together and make something beautiful and practical.
Even during hard times, makeshift quilts kept homes warm and eventually blossomed into a cherished art form.
Quilting Essentials: Your Must-Have Starter Kit
Enough history lessons – here’s a quick rundown of the supplies that’ll be your best friends for your first project (but certainly not your last). Don’t worry, you don’t need everything under the sun.
| Sewing Machine | Fabric | Thread | Rotary Cutter & Cutting Mat |
| Tape Measure | Pins & Safety Pins | Quilting Ruler | Scissors |
| Seam Ripper | Iron & Ironing Board | Fabric Markers | Fabric Glue |
We’ll dive into each of these supplies (in no particular order), so you’ll know exactly what to look for and how to use them.
Sewing Machine
While you can totally make a quilt by hand (we’ll come to that later), a sewing machine is like a super-powered helper that makes things a lot faster.
Don’t worry, you don’t need a giant, fancy machine to get started. Here’s what you really need to look for:
Feet:
You might see terms like “¼-inch foot” and “walking foot” thrown around.
These are just special attachments for your sewing machine that make quilting easier.
We’ll talk more about these later, but for now, just know they’re helpful extras.
Free-Motion Quilting:
This is where you get creative and move your fabric any way you want while stitching.
Your machine should let you lower the “feed dogs” which controls how the fabric feeds through, giving you more freedom for the free-motion quilting once you’re ready to try it.
See-Through Bobbin:
This window on your machine lets you see how much thread you have left.
Running out of thread in the middle of sewing and having to rip things out to start again is no fun, trust us!
As mentioned earlier, sewing machines are a great way to quilt large designs quickly and give your finished piece a polished look.
In fact, most regular sewing machines are great for quilting, patchwork, and appliqué.
Look for one with different stitch lengths and a zig-zag stitch option – these come in handy for various quilting techniques.
There are tons of sewing machines out there at all different prices. While experts love the Brother CP100X and Brother SE700 and highly recommend them for beginners, it’s all about finding a model that fits your budget and feels comfortable for you to use.
Better, try a few out at your nearby sewing machine store before making your choice!
Recommended Sewing Machine for Beginners


Fabric
Now onto the fun part – fabric! You can use pretty much any fabric you love for quilting, but cotton is the most popular choice because it’s easy to work with, super soft, and comes in tons of amazing colours and patterns.
Here’s a quick lowdown on the different ways you can buy fabric for quilting:
#1: Yards
This is the way to go for big quilts, like bedspreads. Just be sure to buy enough – you don’t want to run out halfway through and have to wait for more fabric!
Online stores like Amazon and Etsy have a huge selection of quilting fabrics, so you’re sure to find something you love.
#2: Fat Quarters
These are perfect for beginners or quilters who love patchwork.
They’re smaller pieces of fabric, usually around 18” x 22” when cut by the yard, and often come in bundles with various patterns.
They’re great for experimenting with colours and designs and perfect for smaller projects like wall hangings.

#3: Quilting Panels
Want a quick way to add some pizazz to your quilt?
Quilting panels are pre-printed fabric squares with beautiful designs.
They’re neat for adding a special touch to your quilts, but you’ll still need some regular fabric for the background.
#4: Seasonal Fabrics
Feeling festive? There are fabrics with all sorts of seasonal themes, from adorable bunnies for Easter projects to snowflakes and spruce trees for winter quilts.
Pick something that matches the mood you’re going for!
And don’t forget the centre layer, with which we come to:
#5: Batting/Wadding
Similar to the filling in a sandwich, this is the fluffy stuff that goes in the middle of your quilt and makes it all warm and cuddly.
You can choose between cotton or polyester batting, depending on how warm you want your quilt to be.
Cotton is great for all-season use, while polyester is lighter and easier to wash. A poly-cotton blend gives you the best of both worlds!
There are also different thicknesses (loft) of wadding to choose from. Low loft is generally easier to work with for beginners, so you might want to start there.
We also recommend charm packs or jelly rolls for beginners – they come in a nice variety and are ideal for getting started on your quilting adventure!
|
FAQ: How much fabric do I need for a quilt? Before you hit the fabric store, sketch a rough idea of your quilt’s size. Think about how much extra fabric you want hanging over the edges – like a bedspread with a nice drape. If you have a bedspread you already love, use its measurements as a guide. Fabric likes to shrink a bit in the wash, so add 5% extra for wiggle room, which you can do by multiplying your measurements by 1.05. Also, remember seam allowances – that’s the extra bit of fabric you fold over to sew things together neatly. The more complex you design, the more extra fabric you’ll need for these seams. For the quilt top, sketch out your design and add seam allowances to everything. That’ll help you figure out how much space you have for your quilt blocks or shapes. Most quilters use standard block sizes to make things simpler and then adjust the borders to fit everything together perfectly. Here’s a tip: simply subtract their width from the overall quilt width to find your “play area” for the fun patchwork bits. |
Thread
Now that we’ve sorted out fabrics, let’s talk about the next essential material: thread!
This might seem like a small thing, but it’s what holds your whole quilt together.
Here’s a quick guide to the different types of threads you might use for your first quilt:
#1: Cotton Thread
This is a great all-rounder for piecing your quilt top (sewing the pieces together) and quilting it (stitching the layers together).
If your fabric is 100% cotton, try to find 100% cotton thread for the best results.

| Disclaimer: Most cotton threads work for both machine and hand sewing, but be careful not to use thread specifically made for hand quilting on your machine. It has a special coating to protect it from your hand, but that coating can gunk up your machine. |
#2: Polyester Thread
This thread is super strong and won’t break easily, even after lots of washing.
But be careful with delicate fabrics, because they can be a little sharp.
The good thing about polyester threads is that the colour won’t fade, so your quilt will stay looking bright and beautiful.

#3: Nylon/Rayon Threads
These are more for fancy stitching and appliqué (sewing shapes onto your quilt top). Nylon is really thin, so your stitches won’t disappear around the edges of the appliqué shapes.
Rayon has a nice shine to it, which can make your quilts look elegant.
#4: Silk Thread
This is another thread for appliqué and embroidery. Thin silk works well for appliqué because it blends in with the fabric, while thicker silk makes gorgeous embroidery stitches.
Stranded cotton or silk is best for hand-stitching designs on your quilt top.
With a whole world of quilting threads out there, this is a great starting point! We could talk about threads all day, but let’s move on to the rest of the tools you’ll need to get quilting.
Rotary Cutter & Cutting Mat
Forget scissors! When it comes to quilting, a rotary cutter and cutting mat are your best friends for cutting out precise shapes.
Imagine a pizza cutter but for fabric. That’s the basic idea of a rotary cutter! It has a super sharp blade that lets you cut clean, straight lines with ease.
Most quilters start with a 45mm rotary cutter, which is a good all-around size.
Just be careful when you use it, those blades are whizzes!
A cutting mat, on the other hand, is like a giant cutting board for your fabric.
It protects your table from the sharp rotary cutter blade (and your fingers too!). The bigger the mat, the better, because you make longer cuts without having to move the fabric around as much.
Tape Measure

Every good quilter needs a trusty tape measure!
This is your ruler for ensuring all your fabric pieces are exactly the right size and maintaining even space between the stitches (or seam allowances).
After all, you want your quilt to look nice and professional, right?
Most regular tape measures will do the trick, as long as the numbers are clear and easy to read.
A long tape measure might be a good investment if you’re going all out on a giant project. But for a smaller project, a regular one will do just fine.
Pins & Safety Pins
Pins are incredibly useful for many tasks.
They help you keep your fabric pieces together in all sorts of situations – from securing your quilt top, batting, and backing before sewing to holding appliqué/dressmaking patterns together to keeping your crochet squares in shape.
Basically, they let you arrange how everything looks before you commit to stitches.
There are a few different pin types. Some you might find useful include the regular ones; flat-head pins, which don’t snag on bulky fabrics; safety pins, perfect for basting your quilt layers; and curved pins, great for following curves in your quilt design.
Have a good mix of all these pin types on hand, so you’re ready for anything your quilting project throws your way!
Quilting Ruler
This might be a strange-looking ruler, but trust us, it’s a must-have! Made from tough acrylic, it can handle your rotary cutter without getting scratched up. Basically, it helps you measure and cut your fabric pieces precisely.
There are all sorts of shapes and sizes out there, but don’t worry about getting them all at once. For beginners, a 6½” x 24½” ruler is a great place to start. Later on, you might find a square ruler (6½” or 12½”) helpful, ensuring your quilt blocks are nice and square.
Scissors
We know we told you to ditch the scissors for a rotary cutter, but scissors are still pretty important for quilting.
You probably already have a regular pair at home, and that’s great! They’re handy for quick snips and trimming. Besides a basic one, however, we also recommend having dressmaking and embroidery scissors in your quilting toolkit.
For those wondering, dressmaking scissors are bigger and sharper than regular scissors, making them perfect for cutting long stretches of fabric without tiring your hands out. Just keep them away from paper – that dulls the blades fast. In contrast, embroidery scissors are great for getting into tight spaces and snipping small threads.
Pinking shears also come in handy sometimes. These fancy scissors cut fabric with a zigzag edge which helps prevent fraying. They’re not essential but are useful for those raw edges on your patchwork quilt pieces.
No matter what type of scissors you pick, look for ones with sharp steel blades and handles that feel good to hold.
Seam Ripper
Nobody’s perfect, and even the best quilters make mistakes sometimes! That’s where a seam ripper comes in. This handy little tool helps you undo stitches that aren’t quite right, without damaging the fabric around them.
Think of it like an eraser for your stitches. Just be gentle and take your time when using it, and those little mistakes will disappear like magic.
Iron & Ironing Board
You know how you iron your clothes to make them look crisp and sharp? Well, the same goes for your quilts!
Ironing your fabric before you sew helps everything lay flat and makes your job easier. Then, once your quilt is all finished, giving it a good press makes it look super polished and professional.
Any iron you have at home will probably do. But if you’re looking for a fancy upgrade, there are special cordless irons for quilting that can be easier to manoeuvre around your project.
No matter what iron you use, make sure you have a good ironing board to go with it. Look for one with a sturdy surface and a heat-resistant cover.
Fabric Markers
Fabric markers let you draw your quilting design right onto your fabric, like a giant colouring book.
Tailor’s chalks are perfect for dark fabrics because they show up nice and bright. But be careful, it can brush off easily. Fabric pencils come in all sorts of colours and work on most fabrics.
Better, look for those “air-erasable” pens that vanish after a while, or “water-soluble” ones that wash away with a little water. This way, you won’t have marker marks on your beautiful finished quilt.
Fabric Glue
Fabric glue isn’t exactly essential for quilting but can be a handy helper in some situations.
For instance, if you’re hand-stitching your quilt top together (rather than using a sewing machine), fabric glue can help you baste or temporarily hold the pieces in place before sewing. That makes it easier to get everything nicely lined up.
Some quilters also like to use spray glue to baste the layers of their quilt together before stitching, which can hold more securely than pins sometimes.
Alternative: Get a Quilting Kit Instead

Quilting kits are excellent for jumping right into your first project, especially if you’re feeling a little overwhelmed by all the supplies.
Pros: Lots of kits come with pre-cut fabrics, which means no measuring, cutting, or piecing for you! This is awesome for beginners because those parts can be tricky. Plus, they usually include everything you need to get started, like instructions, patterns, and thread.
Cons: Most kits aren’t complete sets. You might still need a few extra tools from our list of quilting essentials above to get going.
Overall, quilting kits are a great option for quilters who are new and want a clear path to follow. But if you don’t mind collecting your supplies piece by piece, you can definitely do that too!
How to Make a Quilt: Step-by-Step Guide
Alright, enough talk, time for action! We’re going to walk you through the steps of creating your very own quilt, step-by-step.
Don’t worry, we’re starting with a basic patchwork quilt top, so you can get a feel for the process. Then we’ll show you how to layer everything up, and finally, how to quilt it by machine or even by hand. Let’s get started!
Steps to Create a Patchwork Quilt Top
First things first: we need to make the main part of the quilt, the patchwork top! This is where you get to play with all your pretty fabrics.
There are tons of ways to arrange your fabric pieces, but we’re going to start simple with a classic four-patch block, perfect for beginners because it uses fabric squares that you sew together.
|
What You’ll Need
|
#1: Cutting Your Fabric
First, grab your fabric and ruler. You’ll need to cut out four squares that are all the same size. For your first quilt, try squares that are either 8 x 8 inches or 12 x 12 inches. You can use all different coloured squares, two different colours, or all the same colour – it’s totally up to you.
#2: Sewing Your First Square Pair
Take two of your fabric squares and put them together, like making a little fabric sandwich. The pretty sides (the printed sides) should be touching each other. Pin them together along the edge to hold them in place.
Now, sew a straight line along the pinned edge, about ¼ inch away from the edge of the fabric. This is called a seam allowance. Once you’ve sewn your seam, iron it open flat (optional) or to one side.
#3: Making Two Pairs
Repeat Step #2 with your other two fabric squares, after which you should have two pairs of squares sewn together.
#4: Putting the Pieces Together
Take your two pairs of squares and place them together, again with the pretty sides touching. Line up the top and bottom edges carefully. Pin them together and sew another seam, just like before. Don’t forget to iron your seam open (again, optional).
| Tip: When pinning your fabric pieces, use plenty of pins, especially where the seams meet. It’ll help everything stay neat and even. You can also try pressing your seams in opposite directions on adjoining blocks, which should help them nestle together nicely. |
#5: Making a Four-Patch Block
Carefully turn your sewn block right side out. You should see a big square with four smaller squares in the centre. The point where all four squares meet should line up perfectly in the middle.
If your seams aren’t quite perfect and the centre isn’t lined up, don’t worry! That’s what practice is for. Just grab some extra fabric scraps and try again.
#6: Building Your Quilt Top
Now that you’ve mastered the four-patch block, sew a bunch more! Arrange them in rows and columns to create a bigger quilt top. Once you have enough blocks to cover your desired quilt size, it’s time to “square up” your top.
By that, we mean making sure all the edges of your quilt top are straight. Lay your fabric flat on your cutting mat, lining up one of the finishing edges (called a selvedge) with the straight lines on the mat.
Now, check the opposite edge – if it also lines up with the lines on the mat, you’re good to go. If not, use your scissors or rotary cutter to trim that edge straight. Repeat on the other side of the fabric to ensure it’s a perfect rectangle or square.
Congratulations! You’ve just created your very own patchwork quilt top! Now you’re ready to move on to the next steps: layering the quilt and quilting it.
Steps to Make a Quilt Sandwich
Now it’s time to turn your amazing patchwork quilt top into a real quilt with some extra layers. We call this a “quilt sandwich” because it literally is a giant fabric hug for your beautiful top.
If you’ve been paying attention, you’ll know that batting (also called wadding) is what goes in the middle, giving your quilt its cuddly warmth. It comes in different thicknesses, so choose one that suits the weight you want for your quilt.
|
Tips to Get Your Batting Ready
|
Ready to sandwich? Let’s get to it!
#1: Get Prepping
Iron your quilt top on both sides to ensure it’s flat. Press those seams in the best direction for them to lay nicely. Additionally, trim any stray threads you see.
After that, cut your batting and backing fabric. As mentioned, make them a few inches larger than your quilt top on all sides.
There are a few ways to hold the sandwich together. We’ll walk you through a couple of options in the later step.
#2: Laying the Foundation
Put your backing fabric down on a flat surface, with the pretty side facing down. Smooth out any wrinkles.
#3: Building Up the Layers
Place the batting on top of the backing fabric. Again, gently smooth out any lumps or wrinkles you see.
#4: Adding the Quilt Top
Put your quilt top on the very last, with the pretty side facing up. You should be able to see the backing fabric and batting around the edges.
#5: Securing the Layers
Now you need to hold these three layers together so they don’t move around when quilting. You can use masking tape to stick them to your work surface for now. Alternatively:
- Use long pieces of thread to “tack” the layers together loosely in a grid pattern, with stitches about 4 inches apart.
- Pin the layers together all over. Be careful not to bend or snap them. Push in all the way so they don’t snag your fabric.
- Lightly spray the back of your quilt top with basting glue, following the instructions on the can.
There – your quilt sandwich is complete. Regardless of which method you choose to secure the layers, ensure all the layers are nice and secure before moving on to the next step: quilting!
Quilt Sandwich Tutorial – How to Make a Quilt Sandwich – Video Guide
Finishing Your Quilt
You’ve almost reached the finish line – time to turn your quilt sandwich into a real quilt! Here’s where the fun part comes: adding stitching lines that hold everything together and create beautiful designs.
But before that, let’s clear something up: “Quilting” doesn’t just mean making a quilt in general. In this case, it refers to the actual stitching you sew through all three layers of your quilt sandwich, which not only secures the layers but also adds that gorgeous textured look to your finished quilt.
|
Marking Your Masterpiece (Optional) Before you jump in and start stitching, you might want to think about marking your quilt design onto your quilt top. This is totally optional, but it can be a helpful guide, especially for more intricate designs. There are a few ways to do this:
|
We suggest starting with some simple straight-line quilting techniques. They don’t require a lot of marking beforehand, and you can easily build more complex patterns as you get more comfortable. Below are a few of our favourites:
Contour/Outline Quilting:
This follows the shapes of your patchwork pieces, but leaves a small gap between the stitching and the seam (usually ¼ inch).
Try to keep that distance consistent for a polished look.
Echo Quilting: It’s like outline quilting but on repeat. Stitch along the outline of your shape, then repeat the stitching line again and again, moving outwards to create a rippling effect.
Grid/Crosshatch Quilting:
It’s exactly what it sounds like – stitching straight lines in a grid pattern or diagonal lines that crisscross each other.
It’s super easy and a great way to add some detail to plain areas of your quilt.
In-the-Ditch Quilting:
This follows the seams of your patchwork blocks. Basically, you’re stitching right next to those existing seams to secure everything.
You can do this by machine or hand. Plus, you might not need any markings at all!
And with all this in mind, you’re well on your way to quilting your very own masterpiece!
Marking Tips for Light-Coloured Quilt Tops
Want to draw your design directly on your light-coloured quilt top? Here’s how:
#1: Light Box Tracing. Draw your design big on paper, then use a light source (window or lightbox) to see it through your quilt top. Trace the design with a pencil that washes out easily.
#2. Templates. You can make your own templates out of cardboard or plastic or use everyday items like cups for circles. Trace their shapes onto your quilt top.
#3. Store-bought Stencils. They are another option for marking quilting designs, available in various shapes and sizes. All you have to do is secure your quilt top, place the stencil, and trace shapes with a marking tool.
Remember to test the marking tools first! This way you can create beautiful quilting designs without worrying about marks washing out or ironing away.
How to Quilt by Hand: Stitch Anywhere, Anytime!
Learning to hand quilt is a great way to get started, especially for beginners. It’s a super portable craft, so you cuddle up on the couch, take it to a friend’s house, or even stitch while waiting for an appointment.
|
Your Hand Quilting Starter Kit
Hoop or No Hoop? You Decide! You can quilt by hand right in your lap, or if you want some extra support, you can use an embroidery hoop or a quilting frame (a big portable stand). Hoops and frames are great if you’re working on a larger project, but don’t feel you need one to start. |
Let’s get stitching!
#1: Threading the Needle
Cut about 14 to 18 inches of thread and tie a knot at the end. Push the needle down through all three layers of your quilt sandwich (top, batting, back), then pull it up to the surface.
Now, pull the knot back down through the fabric and into the batting to hide it. Make a small stitch backwards (called a backstitch) to secure the thread.
#2: Starting Your Stitch Line
Place your middle finger on the back of the quilt where you want the needle to come out. Push the needle down straight until it touches your finger, then push it back up.
After that, move the needle forward across the fabric a bit, and then push it back down vertically again. Repeat this a few times to create a few stitches on your needle.
#3: Keep Stitching
Pull the needle all the way through the quilt, ensuring your stitches lay flat. Keep stitching this way, double-checking that your stitches are all about the same size and spaced evenly.
You might find the seams between your patchwork pieces a little tricky – that’s okay! Just take it slow and do one stitch at a time in those areas.
#4: Finishing Up
When you’re ready to stop stitching, tie a knot at the end of your thread and weave the needle back down into the batting to hide the knot. Then, snip off the extra thread with scissors.
And there you have it! You’ve just conquered hand quilting! Now you can keep practising and quilting your way to a beautiful, handmade quilt, stitch by stitch.
How to Quilt by Machine: Stitch Like a Pro!
So you’ve mastered the art of hand quilting, or perhaps you’re just itching to try something a little faster. That’s where machine quilting comes in! It’s perfect for stitching larger quilts or for those who want to save some time.
The key to machine quilting is to take it slow and easy, especially at first. Maybe try practising on a smaller project, like a pillowcase, to get the hang of it before tackling your giant quilt masterpiece.
Once you feel comfortable, you can even try “free-motion quilting”, which is basically like drawing with your sewing machine instead of a pen.
|
Gear up for Machine Quilting
|
Let’s machine quilt!
#1: Prep Your Quilt Sandwich
Get your quilt sandwich all ready to go. If you want to add some quilting patterns, mark them on your quilt top first. For larger quilts, you might need to use an extra table to support the fabric on the left side of your machine.
To make things easier to manoeuvre, roll up the excess fabric around the edges and secure it with clips.
#2: Start Stitching
Begin quilting near the middle of your quilt and work your way outwards. You can start a line of stitching by sewing in place for a second (set your stitch length to 0). It’s usually best to stitch in the same direction whenever possible.
#3: Follow the Lines
Now that you’ve started, follow your marked lines or quilt your own design. Try to sew long lines whenever you can.
For crosshatch/grid patterns, use the width of your machine’s foot to keep your lines evenly spaced.
If possible, begin and end your stitching on the sides of your quilt, so you have fewer thread ends to deal with later.
#4: Finishing Touches
Once you’ve finished quilting your entire quilt top, secure your thread by stitching it in place for a second.
Some quilters trim the thread ends right away, while others prefer to weave them into the batting using a needle.
Almost There!
Now that the stitching is done, there are a couple more things to take care of.
Remove any basting stitches or safety pins you used to secure the layers. Take care of those thread ends; tie them off and tuck them into the batting so they disappear. If the thread ends are on the quilt’s sides, leave them for now – the binding will take care of them later.
Next, give your quilt a good press on both sides, then trim the edges of all three layers so that they match your quilt top’s size.
One last thing: check your quilt is all square and even, after which you’re ready for the final step: binding your quilt!
How to Bind Your Quilt: The Grand Finale
The final step (for real this time) to transforming your quilt sandwich into a usable and beautiful masterpiece is binding the edges. It’ll keep all the layers together and make it comfy to cuddle under.
There are a few different ways to bind a quilt, but we’ll walk you through a simple machine-binding method.
|
Binding Basics
|
#1: Prepare the Binding
If you cut your own strips, iron them in half lengthwise, wrong sides together. This creates a neat folded edge.
#2: Attaching the Binding
Starting at the centre of a side, pin the raw edge of the binding along the raw edge of your quilt, right sides together. The fold of the binding should be facing outwards. Sew along the pinned edge using a straight stitch.
#3: Mitring the Corners
When you get to a corner, stop stitching a ¼ inch before the edge. Fold the binding up and across the corner, forming a diagonal line. Fold the excess binding down along the next side of your quilt, and pin it in place. Trim off the excess at a 45° angle.
Repeat this process to create a mitred corner that folds nicely. Continue sewing the binding around the quilt, mitring each corner as you move.
#4. Finishing Touches
Once you’ve sewn all the way around, fold the raw edge of the binding inwards towards the back of the quilt. Pin and sew it down close to the edge, catching the raw edge of the binding and the edge of your quilt top in the stitch. Trim off any excess thread.
| Tip: When sewing the binding on, trim off a bit of the excess quilt top fabric at the corners to help the binding fold smoothly. |
There you have it! Your quilt is bound, beautiful, and ready to be used or displayed with pride. You’ve created a work of art from start to finish – give yourself a pat on the back!
Learn How to Quilt As You Go (QAYG)
Short on space or time for quilting? Look no further than the Quilt As You Go (QAYG) method! This technique allows you to quilt your quilt block by block before you assemble the whole thing. It’s the best way to break down a big project into manageable bites.
|
Why QAYG is Awesome for Beginners Instead of wrestling with a giant quilt, you can work on smaller, easier-to-handle quilt blocks. Then you can simply join your already-quilted blocks together with your sewing machine! |
Let’s quilt as we go!
#1: Prep Your Block
Cut a piece of batting slightly bigger than your quilt block and mark the centre. Then, cut out the fabric pieces for your block.
Lay the first piece, right side facing up, in the middle of the batting. Put the second piece on top, with the right sides together, and sew them with a ¼” seam.
#2: Quilt Your Block
Open up your sewn piece and iron it flat. Now’s the fun part – quilt some stitching lines over the top of both pieces!
Add the next piece of fabric to your block, sew it on, iron it flat, and quilt it just like before. Keep going until your block is all finished.
#3: Squaring Up and Joining
Use a ruler to make sure all the blocks are square and the same size. Play around with arranging them in rows. Once you’re happy with the layout, sew the blocks in rows using a ¼” seam.
To help the seams lie flat, clip the corners of the fabric at an angle before stitching.
#4: Putting it All Together
Press open the seams on your rows, then sew the rows together again with a ¼” seam. Iron those seams open one last time.
Now that all your blocks are joined, baste (temporarily stitch) them onto a large piece of backing fabric.
#5: Finishing Touches
Stitch alongside the seams of your blocks (in the “ditch”) to create a grid-like pattern on your quilt top. Finally, bind the edges to give your quilt a polished look.
Voila! Quilting as you go, one block at a time. It’s a fun and manageable way to create a beautiful quilt, even if you’re short on space and time.
Quilting Patterns for Beginners
Just getting started with quilting? Welcome aboard! We’ve got a whole treasure trove of resources waiting for you right here.
Dive into our “Quilt” category and you’ll be swimming in inspiration for beginner-friendly quilting projects.
We’ve got tons of FREE and EASY quilt block patterns to choose from, plus all sorts of other helpful tips and tricks to get you started on your quilting journey.
How to Quilt on a Budget
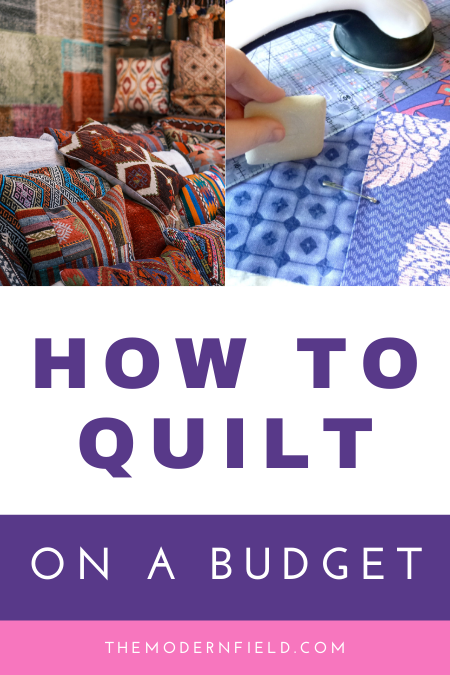
Let’s talk about the budget-friendly side of quilting! Quilting can seem expensive, but it certainly doesn’t have to be.
You can create stunning quilts without breaking the bank – all you need are a few clever tricks. Here are some to stretch your quilting dollar as far as it can go:
#1: Befriend Fellow Quilters. Let your friends and family know you’re taking up quilting. You might be surprised! They could have a stash of fabric they’d be happy to share, or maybe even a sewing machine you can borrow to get started.
#2: Hit Up the Thrift Stores. Visit your nearest thrift stores and see what treasures you can find! Look for extra-large clothes – they can be cut up into perfect quilt squares. And don’t forget to check for quilting tools. Who knows, you just might find those cutting mats and measuring tapes hiding amongst other goodies!
#3: Free Patterns are Your Friend! There’s a whole world of free quilting patterns waiting for you online! Go through our quilt-related posts, search the web, and find and pattern that works for you.
#4: YouTube University. YouTube is packed with free video tutorials on quilting! Learn all sorts of techniques, from sewing patterns to piecing methods, and get inspired by watching other quilters create beautiful things.
With a little creativity and resourcefulness, you can totally quilt on a budget.
At a Glance: Basic Quilting Terminology
Before you jump into quilting, you might hear a few fun terms thrown around. Don’t worry, they’re all pretty easy to comprehend. Here’s a quick cheat sheet to get you talking like a quilting pro:
| Quilting Term | Definition |
| Appliqué | Adding pieces of fabric on top of the quilt to create designs |
| Block | This is like a puzzle piece for your quilt. You sew a bunch of blocks together to make the quilt top. |
| Backing | This is the fabric on the back of your quilt, the side you cuddle up with! |
| Batting | In case you forgot, it’s the fluffy centre of your quilt sandwich. It adds warmth and keeps you cosy. |
| Binding | This is the trim around the edge of your quilt. It covers up the raw fabric edges and makes it look nice and finished. |
| Basting | This is the prep work for quilting your masterpiece. You layer your quilt top, batting, and backing together, sometimes pinning or temporarily stitching them to ensure everything stays put while you quilt. |
| Charm Pack | They are bundles of little fabric squares, all different colours and patterns. Perfect for creating scrappy quilts or bringing vibrancy to your project. |
| Fat Quarter | A pre-cut piece of fabric that measures 18″ x 22″. It has nothing to do with the weight of your fabric. |
| Grain | The direction of the threads in a fabric, which can affect how it behaves when cut and sewn. |
| Half-Square Triangle (HST) | Imagine cutting a square in half diagonally – that’s a half-square triangle. Sew two of these together in different colours, and you’ve got a cool block with a diagonal line. |
| Jelly Roll | A “jelly roll” is a long roll of fabric with a repeating pattern, usually sold pre-cut. Quilters love them for creating strips to use in borders or for quick and easy quilts with a cohesive look. |
| Piecing | This is the process of sewing smaller fabric pieces to create a larger piece, like sewing those quilt blocks together. |
| Pressing | Using an iron to flatten seams and fabric pieces for a neat finish. You’ll want to press your seams open most of the time in quilting, so they lay flat. |
| Sashing | These are strips of fabric you can insert between your quilt blocks. They can add space, create a border, or make your quilt pop. |
| Scrappy | It means using lots of leftover fabric scraps in your quilt. It’s a good way to be creative and save money, and it creates a fun, mismatched look. |
| Seam Allowance | The area between the edge of the fabric and the stitching line, typically ¼ inch in quilting. |
| UFO (Unfinished Object) | A project you’ve started but haven’t finished yet. |
Now you can chat with any quilter and hold your own with this list of common lingo under your belt!
Tips for Quilting Success
#1: Slow and Steady Wins the Race. Quilting can take time, so don’t rush the process. Relax, enjoy each step, and savour the satisfaction of creating something beautiful.
#2: Embrace the Mistakes. We all make them! Don’t let little errors discourage you. They’re just part of the learning journey.
#3: Practice Makes Perfect. With each quilt you make, your skills will keep getting better and better.
#4: Join the Quilt Crew! Connect with other quilters online or at local groups. You’ll learn tons from experienced quilters and find endless inspiration for your future quilts.
You’re Officially a Quilter!
So there you have it! You’ve just learned the basics of quilting, and guess what? You’re officially a quilter!
The beauty of quilting is that anyone can do it. Whether you’re a seasoned sewist or a complete beginner, quilting is an activity all folks can enjoy, regardless of age or background.
Really, there’s no better time than now to jump into this craft – with a little practice, you’ll discover it’s a fun, relaxing, and super creative way to unwind and express yourself.
But perhaps the best part about quilting is the amazing community you’ll become part of. Sharing your love of quilting with others is a fantastic opportunity to make new friends, swap tips and tricks, and get tons of inspiration for your next project.
Now that we’re wrapping up, we hope this beginner’s guide has been helpful in your quilting adventure.
Bookmark this as your go-to resource for all things quilting. Remember to refer back to here whenever you need a refresher, and be sure to check back on our homepage for the latest posts!
And of course, if you have any questions, don’t hesitate to ask in the comments below – we’re always happy to help a fellow quilter out. Happy Quilting!